Oven Barbecue Brisket


It was raining outside. It was Labor Day weekend. It was suppose to be a weekend filled with BBQ on the grill. The rain was on and the grill was off…at least for two days. I was not totally complaining about the rain. Missouri was in a drought most of the summer. My yard looked like a dessert. It was probably a little bit selfish of me to think of the rain ruining my big bbq plans…..I had to think of a solution and quick…my stomach was saying bbq bbq….well not really, cause stomachs can’t actually talk (right?) but mine was giving me the signal of bbq withdrawal.

I remembered, I had this great recipe for Oven BBQ Brisket. Brisket is one of those tricky cuts of meat. When it is done right, you have this pull apart tender, rich slice of heaven. When it is done wrong….well the closest thing I can think of is shoe leather and grease. Don’t be afraid. This recipe is rediculously easy. A perfect solution when the weather is not cooperating outside.  Just remember, you need to marinate the brisket overnight in the refrigerator the night before.

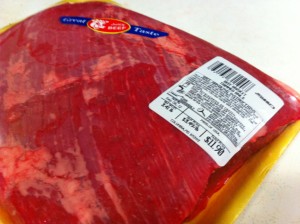
First, start off with a trimmed piece of brisket. This is about a three and a half pound brisket.


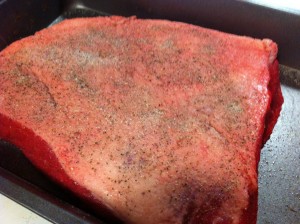
There is fat layer underneath all this brisket. After you get the seasoning rubbed into the meat, you will want to bake the brisket with the fat side up. This way, all the rendering of fat seeps down into the meat to add flavor and of course tenderness.

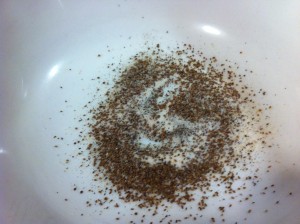
In a bowl mix together celery seeds, garlic salt, onion salt and sugar.

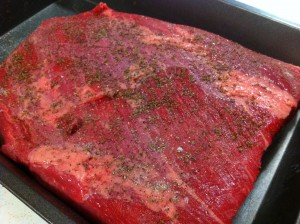
Rub the seasoning into both sides of the meat. Rub a dub dub.


See the layer of fat?

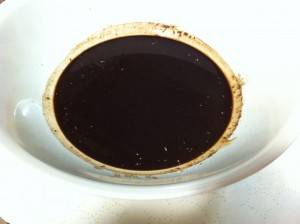
Mix together liquid smoke and Worcestershire sauce.  

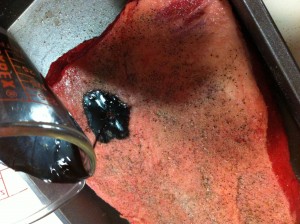
Pour othe sauce over both sides of the brisket.

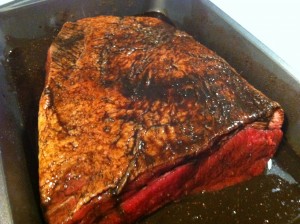
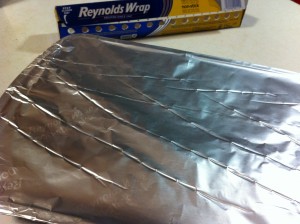
All lathered up with seasonings and sauce. Now, it is time to put this baby to bed. Cover tightly with foil and put it into the fridge to spend the night. Nighty nite!

Wake up! Now it is time to bake! About five hours before you want to eat (if you are making a 3 and 1/2 pound brisket, earlier, if you are making a larger one) turn your oven on 300 degrees. Your brisket will need to bake for about one hour per pound or until tender.

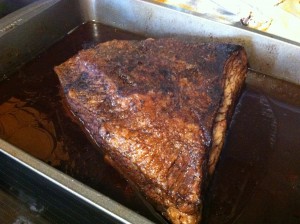
This is my brisket 4 hours later.

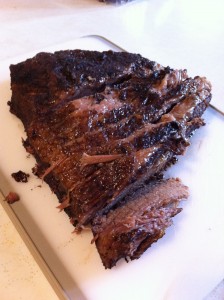
Now, take your brisket out and thinly slice.

You might want to sneak a bite right now. It is really good. It will get even better!

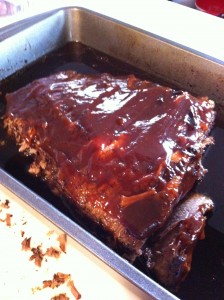
Place the brisket back in the pan with all those juices and pour your favorite bbq sauce over it

Bake uncovered at 300 degrees for another hour. (I  lightly sprinkled brown sugar over the top of my brisket. I just wanted too : ).  

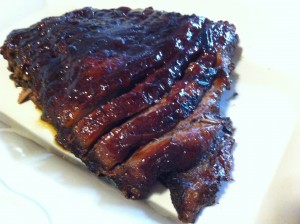
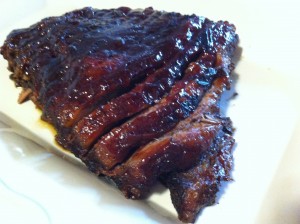
This is what it looks like when it comes out of the oven.

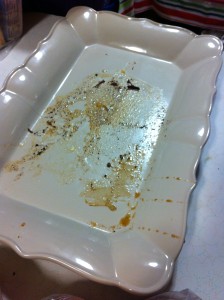
This is what it looks like after we eat.

Which way did it go………

Grab your fork, let it rain and eat bbq!

Enjoy,

Becky

Oven BBQ Brisket    

Ingredient:  

3 to 4 pounds trimmed brisket

2 teaspoon celery salt

1 teasoon garlic salt

1 teaspoon onion salt

2 teaspoon sugar

4 tablespoon liquid smoke

4 tablespoon worcestershire sauce

2 to 3 tablespoons brown sugar

1 cup of your favorite bbq sauce. I  usedSweet Baby’s Ray Honey Barbecue Sauce)

Directions:

The night before you bake it.

Mix garlic salt, onion salt, sugar and celery seed together. Rub the seasoning into both sides of the brisket. Place brisket into a 9 by 13 baking dish.

In a bowl, stir together worcestershire sauce and liquid smoke. Pour over both sides of brisket.

Cover pan with foil and place brisket into the fridge to marinate over night..

Five hours before you plan to serve the brisket. Heat oven to 300 degrees. Place the brisket into the oven and slow bake the brisket approximately one hour per pound or until tender.

Take brisket out of the oven and place on a cutting board. Thinly slice brisket and carefully place it back into baking dish.

Pour barbeque sauce over the brisket. Sprinkle brown suger on top of brisket.

Bake the brisket, uncovered back into the oven. Bake for one hour in a 300 degree oven.
Key Lime Cake

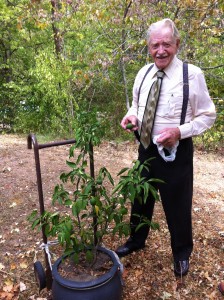
      You are never to old to plant a lime tree. My 94 year old dad proved that by planting a lime tree 6 years ago. On a family vacation to Florida six years ago, my dad bought a little lime tree that came in a box at a souvenir shop. He carried that little box home and told everyone he was going to plant a lime tree. We did not remind him that we live in Missouri, and lime trees do not exactly grow in Missouri. Anywho, my dad planted this little tree in a pot and six years later…..ShaZaam…he has limes.


He hauled his lime tree outside in the summer and hauled it back inside in the winter….for six years. Last year he had four limes, but this year

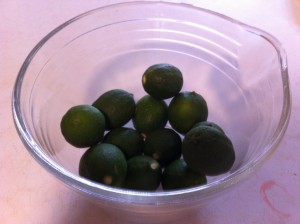
he had about a dozen. Guess who got the limes……yeppers….me!
Now, that I had Dad’s limes, I needed to find a great recipe using lime juice. I had recently watched a show featuring Trisha Yearwood’s lime cake. Ding, Ding, Ding..lime cake it is.

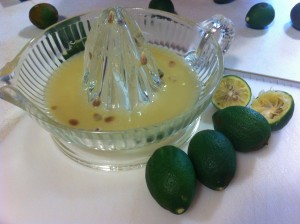
First, for the glaze,  you need to squeze the limes to get the juice out. You might try microwaving them for 10 seconds and then rolling them on the table before squeezing to get more juice out. I still needed to buy more lime juice at the store to make up the difference. Save the juice to make the glaze.

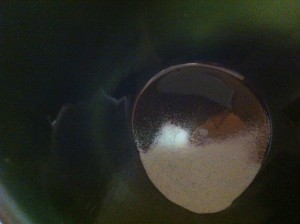
In a mixing bowl, add lime jello. Then add the sugar to the lime jello. See that little speck of green…that is the lime jello : )

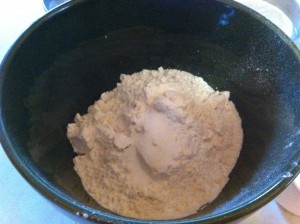
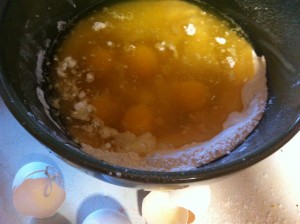
Next, add the flour, salt, baking powder and baking soda. Stir and mix well. Next, add the eggs, oil, orange juice, lime juice and vanilla.

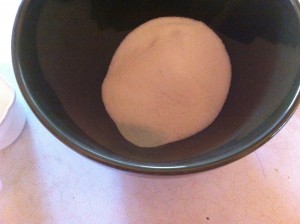
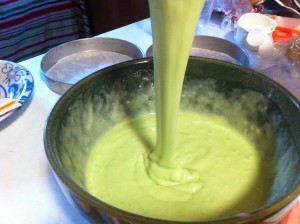
Next, mix together until combined. Don’t you love the green color from the lime jello??

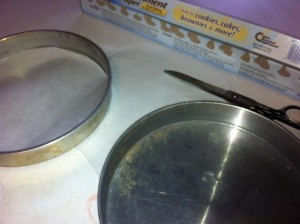
Prepare your pans. You can bake this cake in a 9 by 12 sheet cake pan or bake it in two layer pans. Since we were celebrating Dad’ harvest from his lime tree, I decided to make a layered cake. I alway spray my pans lightly with a vegetable spray and cover the bottom of the pans with parchment paper. I never have to worry about losing half my cake from geting stuck in the pan.
Put even amounts of batter into each pan. Place in a preheated 350 degree oven and bake for 35 minutes.
While the cake is baking, it is now time to get out all that lime juice.. In a mixing bowl, mix the lime juice and confectioners sugar together. I had to microwave mine to get all the sugar to dissolve.

When the cakes come out of the oven, cool the cakes for 5 minutes. Remove cakes from pans and place on a cooling rack.

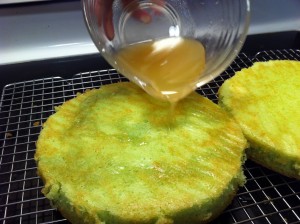
While cake is still warm, pierce the cake with a fork or skewer and pour the glaze over the cakes. Allow cakes to cool completely.

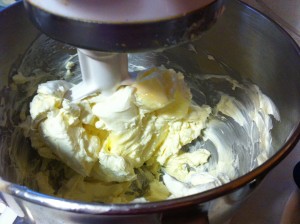
Time to make the cream cheese icing. Cream the butter and cream cheese together in a mixing bowl.

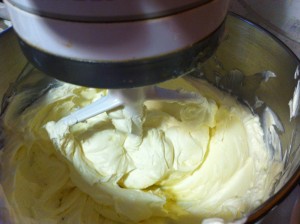
After you are finished creaming them together, add the powdered sugar.

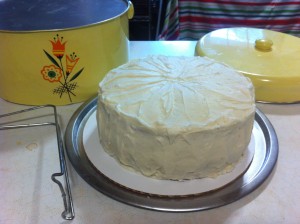
Almost done!!! Time to ice the cake.

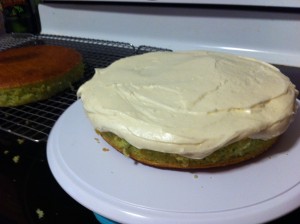
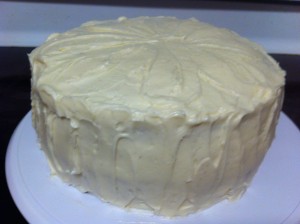
I always ice a cake passed the edge of the cake. It makes it easier to ice the sides. Place the other cake on top, and ice top and sides.  All finished!

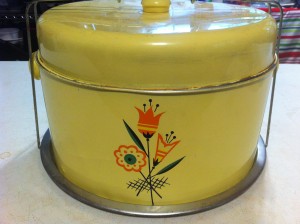
Now, it was time to pack up the cake and take it to Mom’s and Dad’s for our dessert. My Dad bought me an antique cake carrier for Christmas, and it was perfect to take the cake for the drive to Mom’s and Dad’s.

All packed up! Kinda like putting a baby in a car seat : )

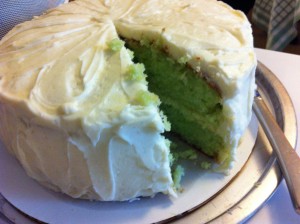
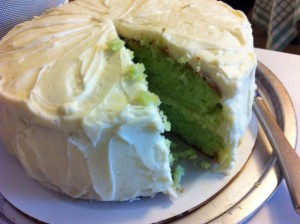
Who gets the first piece?

Dad does!

Key Lime Cake recipe adapted from Trisha Yearwood’s recipe

Ingredients:

For the Cake:

1 – three ounce package of lime flavored gelatin

1 1/3 cup of sugar

2 cups sifted all purpose flor

1/2 teaspoon salt

1 teaspoon baking powder

1 teaspoon baking soda

1 cup vegetable oil

3/4 cup orange juice

1 tablespoon lime juice

1/2 teaspoon vanilla extract

5 large eggs, slightly beaten

For the Glaze:

1/2 cup key lime juice (it takes about 25 key limes or 4 large limes)

1/2 cup confectioners sugar

For the Icing:

1/2 cup butter at room temperature

one 8 ounce package of cream cheese room temperature

one pound box confectioner’s sugar

NOTE: I doubled the icing recipe because I was making a layered cake. I did have left over icing so try making 1 and 1/2 recipes of icing)

Directions:

Preheat oven to 350 degrees

In a large mixing bowl, mix the gelatin, granulated sugar, flour, salt baking powder and soda. Stir to mix well. Add the oil, orange juice, lime juice, vanilla and eggs. Mix until well combined. Pour the batter evenly i the pan and bake for 35 minutes. Be sure and check you cake often at the end, the cake tends to get very brown on top. When done, cool the cake in the pan for about 5 minutes and then place on a cooling rack.

For the glaze: While the cake is still hot, mix the lime juice and confectioners sugar together. If you are having a hard time getting the sugar to dissolve try microwaving the glaze for a minute. Pierce the cake and while the cake is hot, pour the glaze over the layers. Let cool completely.

For the icing: Cream the butter and cream cheese. Beat in the confectioners sugar until mixture is smooth. (I added some vanilla paste, just cause I love those little specks of vanilla beans). Spread the icing on the top of the bottom layer of cake. Place the top layer on and ice the top and sides.

This cake was moist and tangyingly good! So different and so divine!

Pucker up with lime cake!

Enjoy,

Becky

Cornbread Salad

The first time I had ever heard of cornbread salad was when I went to my long time friend Barb’s house for her annual Brunch and Ornament Exchange. Barb always has the most fabulous food. You look at her table loaded down with all sorts of delectable treats and you just want to take the serving spoon and take a big bite out of everything.  A couple of years ago, I spied a different looking salad. Hesitantly, I asked what it was and was told…Cornbread Salad. I put a small scoop on my plate, made my way through the crowd….she has BIG parties….and tasted this strange looking concoction. I was in love after the first bite.

Today, one of our teachers at my school had his annual, “Beginning of School BBQ” for his students. I was lucking enough to be invited and decided to make this salad to share with fellow teachers and his students. They too, looked hesitantly as the salad….I was the first brave soul to take a scoop, (well, I was the first in line haha) after telling them what it was….they took a small bite….and as with me, it was love at first bite. I hope it will be with you too.

Enjoy!

Becky

Cornbread Salad

1  8 1/2 ounce Box Jiffy mix (you can use another brand but I like the sweetness in this mix)

1 (1 ounce) package of dry ranch style dressing mix

1 cup sour cream

1 cup mayonnaise

1/2 cup chopped sweet red peppers

1/2 cup chopped sweet orange peppers

1/2 cup chopped onion

3 large tomatoes (I took the pulp and seeds out)

1  (16 ounce) pinto beans drained and rinse ( I have also used black beans and or kidney beans)

2 cups frozen sweet corn

2 cups grated cheddar cheese (I usually need a little more cause…well…I like cheese haha)

10 slices bacons that has been cooked till crispy and crumbled.

Directions:

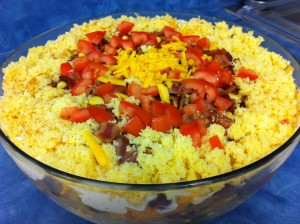
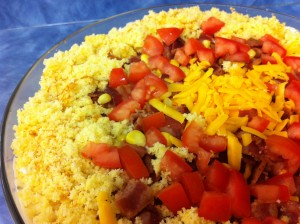
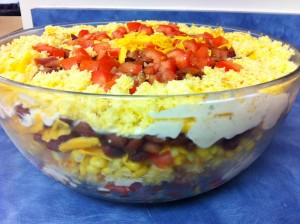
Bake the corn bread mix according to the package. Cool. Stir together the dry ranch dressing, mayonnaise and sour cream.  Dice the tomatoes, onions, red and orange peppers. In a large bowl combine the  peppers, tomatoes, onions, rinse and drained pinto beans and corn.  In a large glass bowl, (because you can see the pretty layers) start layering the salad. Layer half the cornbread on the bottom. Top with half the veggie mixture. On top of the the veggies, put half the cheese. On top of the cheese put half of the bacon. Now dollop half the dressing on top of the bacon. Repeat all the layers again. I always save a little (or use a little more bacon and cheese and cornbread) to garnish on top.

Can you see the layers? The one I made in this picture, I left all the vegetables and beans separated and layered them individually in the salad. Taste the same but just adds more layers.

Anyway you decided to make it, it will be a fabulous addition to your meal.

Tomatoes and Fresh Mozzarella Salad

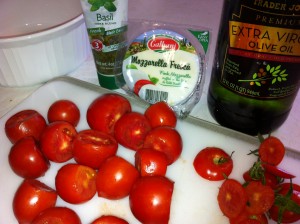
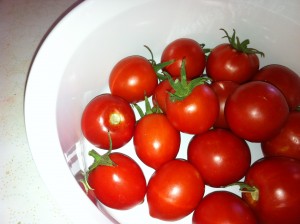
The weather in Missouri has been so hot this summer! I am sad, but relieved, that I did not plant any tomato plants. Today, a good friend of mine, Carol, brought in fresh tomatoes from her garden to share at school.  Due to the weather, the tomatoes did not get very big. But, what they lacked in size, the made up in flavor. I came home from work and made this super easy salad to go with our dinner.

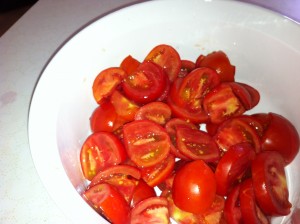
First, wash all tomatoes and slice each one in two or three slices.

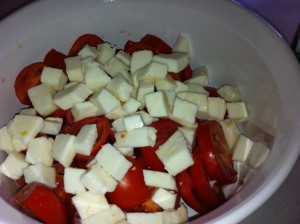
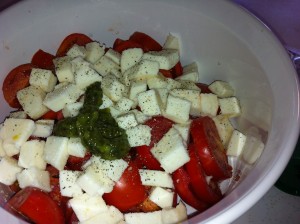
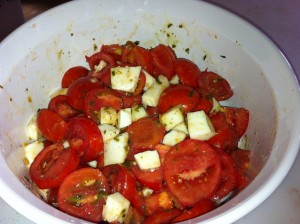
I bought a 8 ounce container of fresh mozzarella just because it was cheaper than the fresh mozzarella balls. If  you prefer to use mozzarella balls and just cut them in half, no problem : ). I only used 4 ounces of the cheese.  I slice and cubed the mozzarella into bite size pieces and added them to the sliced tomatoes.

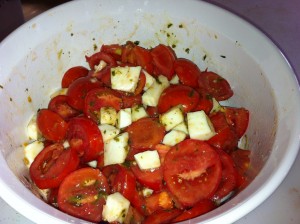
Next, I salted and peppered the salad to taste and squeezed in about 2 tablespoons organic basil I had in a tube. I would have used fresh, but I already had the fresh basil that you can buy in a tube….and well….I love to cook but I also like to use what I have in the fridge. Call me frugal….crazy….but I can tell you it still tasted delicious. If you have fresh basil, gently chopped 8 leaves of basil and add to the tomatoes and mozzarella.

Lastly, drizzle 2 tablespoons of olive oil over the salad.

Stir all the ingredients together and refrigerate until you are ready to serve.

The great thing about this recipe, is that you can add more cheese, less cheese, more basil, less basil….just drive your taste buds crazy!

So easy….so good!

Becky

Here is the complete recipe:

Tomatoes and Fresh Mozzarella Salad

2 heaping cups sliced ripe tomatoes

4 ounces fresh mozzarella cubed

salt and pepper to taste

2 tablespoons olive oil

2 tablespoons of basil that comes in tube or 8 fresh basil leaves

feel free to add 2 or three slices of thinly sliced sweet onion to this recipe to add flavor and crunch.

Stir together and serve immediately or refrigerate until ready to serve. 


Related Posts Plugin for WordPress, Blogger...